WooCommerce
Accept payments on Square Hosted Checkout from your WooCommerce store.
Enable the gateway
- Connect Square and save a location.
- Go to WooCommerce → Settings → Payments.
- Enable Payments Square Connect.
- Set the checkout title and description (optional).
Checkout flow
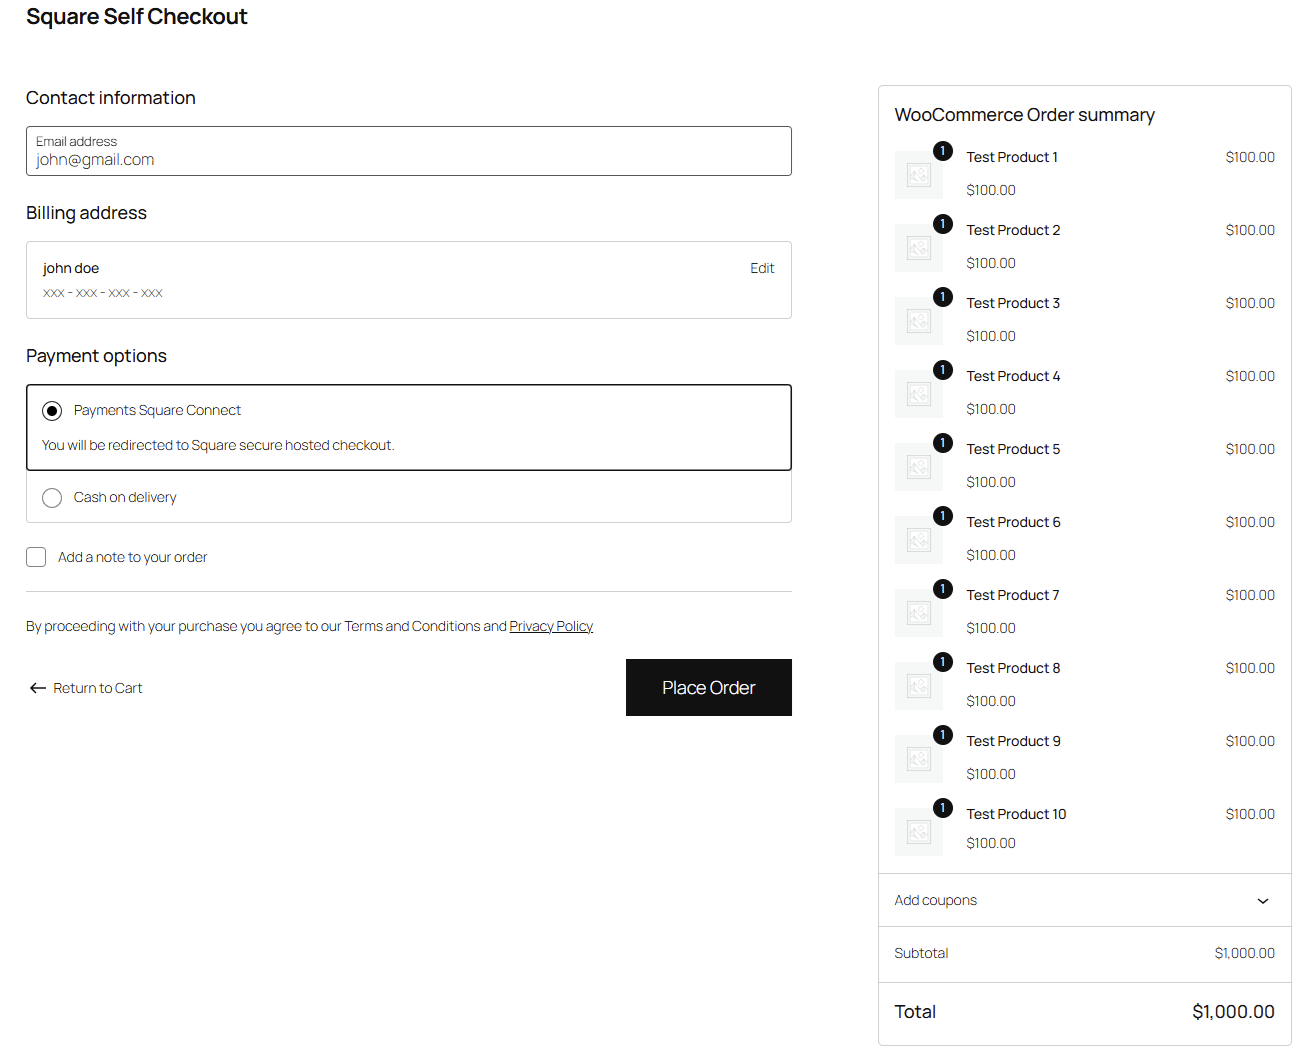
- Customer places an order on your site and clicks Place order.
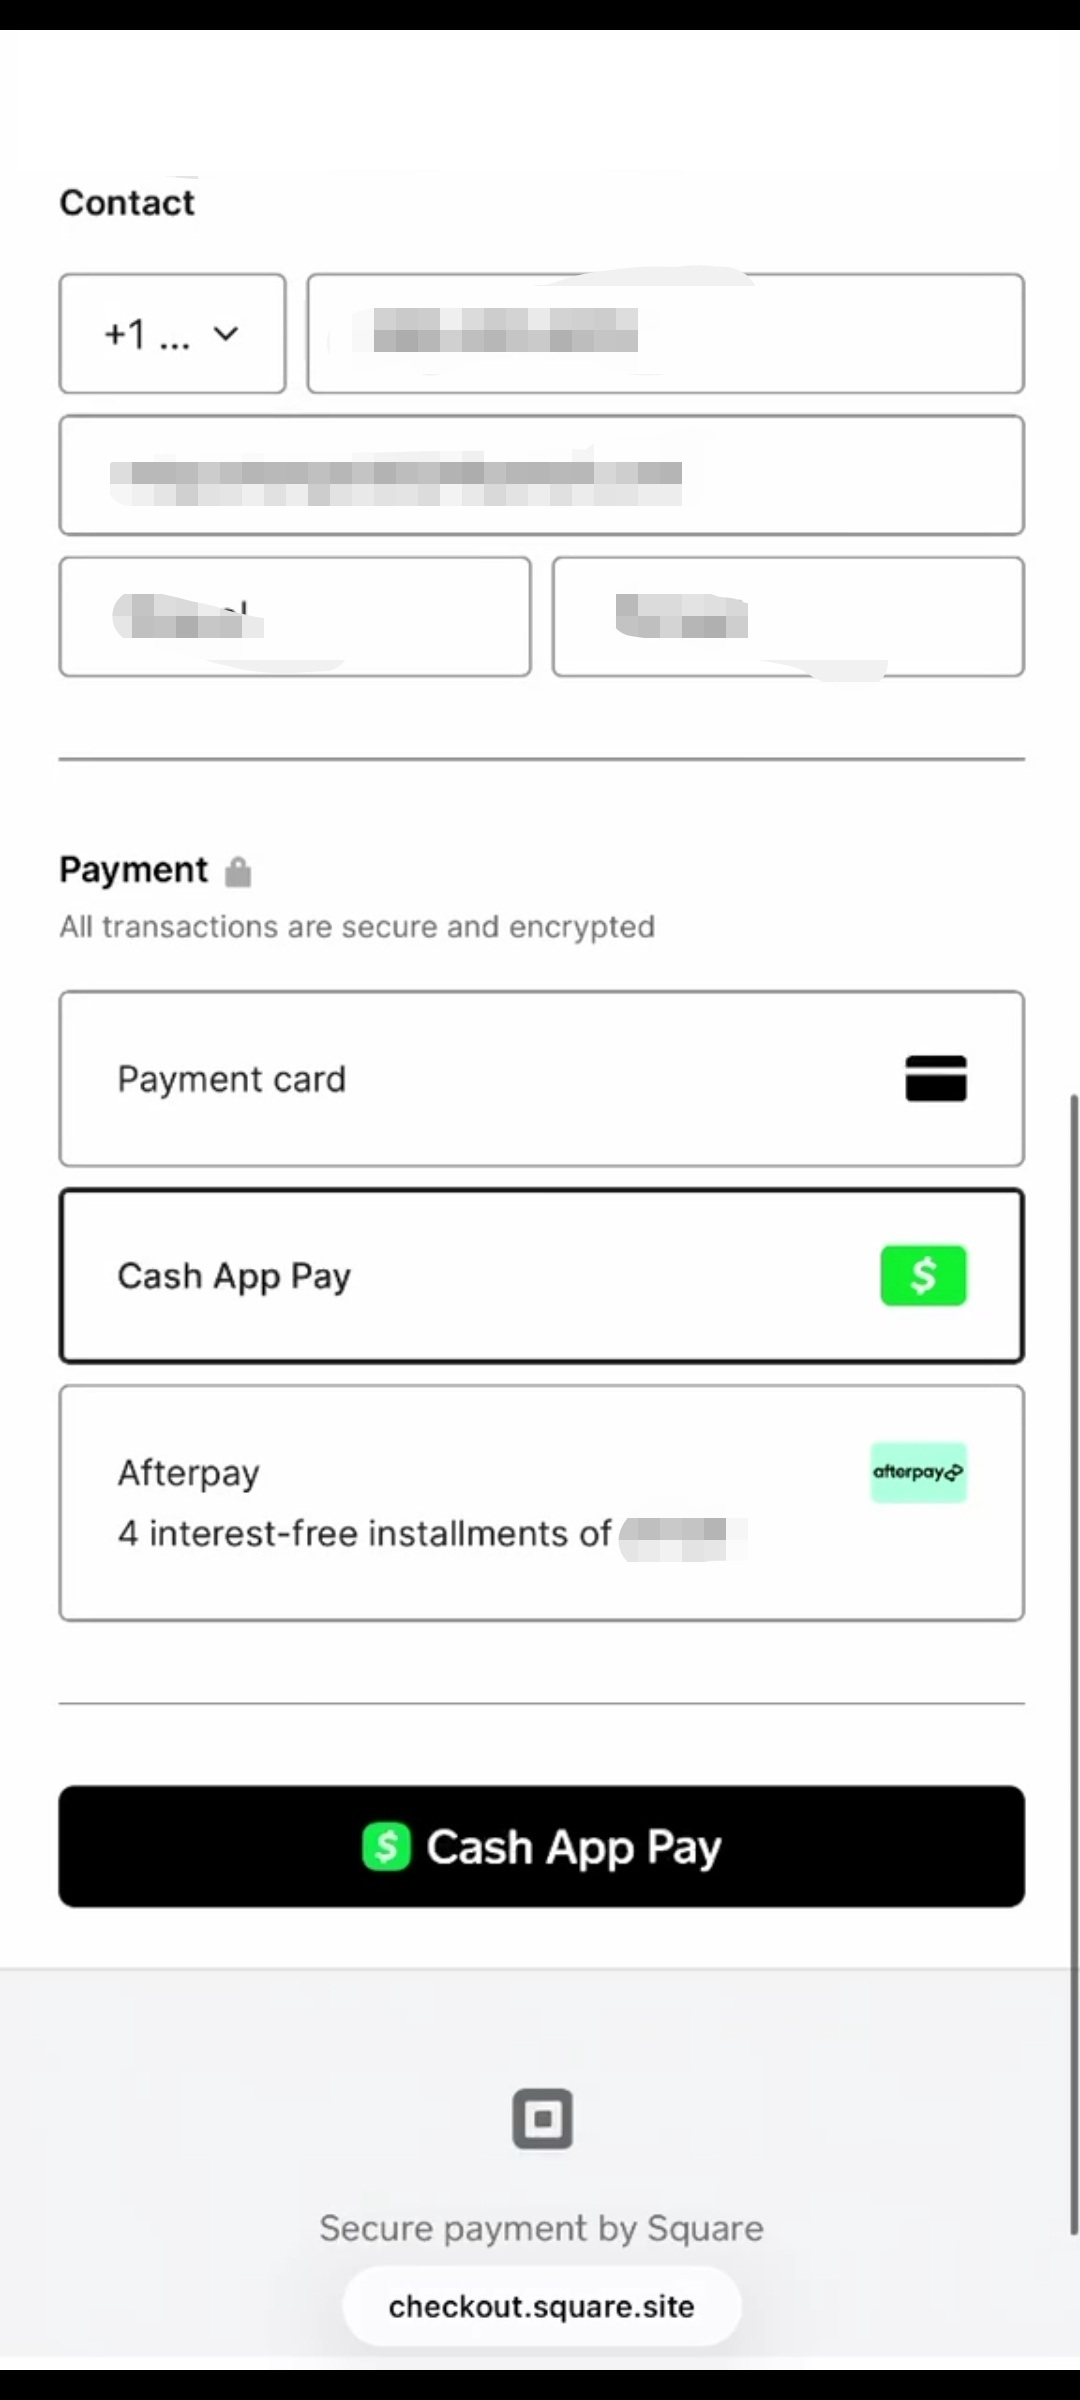
- They are redirected to Square Hosted Checkout to pay securely (card, Cash App Pay, Afterpay, and other enabled wallets).
- Order status stays Pending while they pay on Square.
- After Square confirms payment, the customer returns to your Order received page.
- Order moves to Processing (or your configured status).
Card numbers are never entered on your WordPress site.
Digital wallets
Apple Pay, Google Pay, Cash App Pay, and Afterpay (when enabled) appear on Square's page. Configure wallets under Checkout Settings in Live mode.
Stock sync
When product SKUs match between WooCommerce and Square catalog, paid orders can update Square inventory. See Stock Sync.